WebVirtCloud Installation Guide

Repository: https://github.com/oneclickvirt/webvirtcloud
Origin Repository::https://github.com/oneclickvirt/webvirtcloud_retspen
Controller Node and Computer Node Installation
- Supported Systems: Debian10+, Ubuntu18.04+, Centos8+, AlmaLinux8+, RockyLinux8+
- Recommended system: Debian12+, Ubuntu22.04+.
- Lower versions of the system will automatically compile the new version of python installation package before deployment, so it is recommended to use a new system without compiling directly installed!
curl -slk https://raw.githubusercontent.com/oneclickvirt/webvirtcloud/main/scripts/install_webvirt_cloud_retspen.sh -o install_webvirt_cloud_retspen.sh \
&& chmod +x install_webvirt_cloud_retspen.sh \
&& bash install_webvirt_cloud_retspen.shAfter installation is complete, open the public IP address to access the login page.
The default login username and password are both admin. Make sure to change them after logging in.
Creating a Linux Virtual Machine
After entering the control panel and changing the admin password, you need to manually configure a compute node.
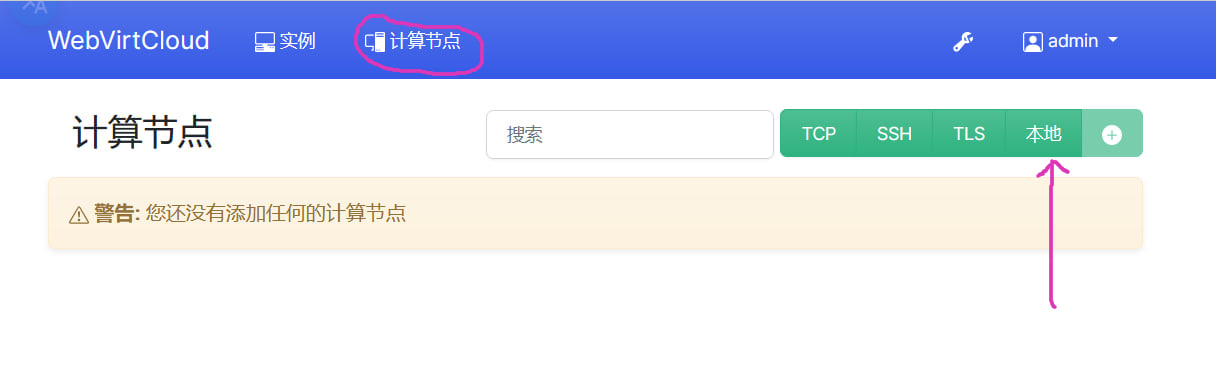
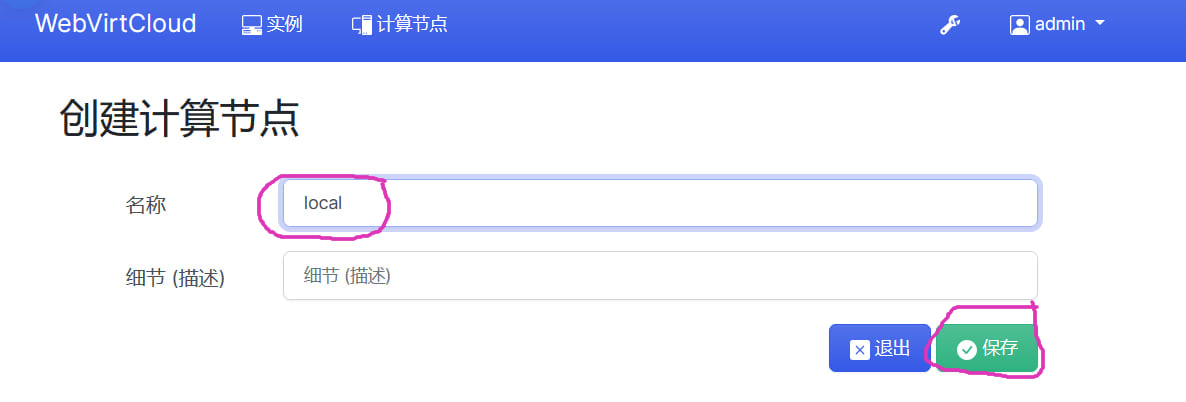
Select the type as Local, and name it local.
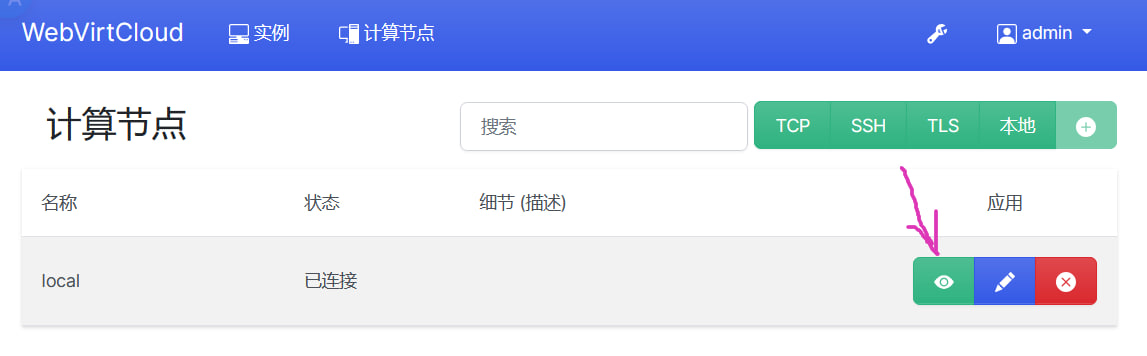
After creation, click the eye icon to enter the view.
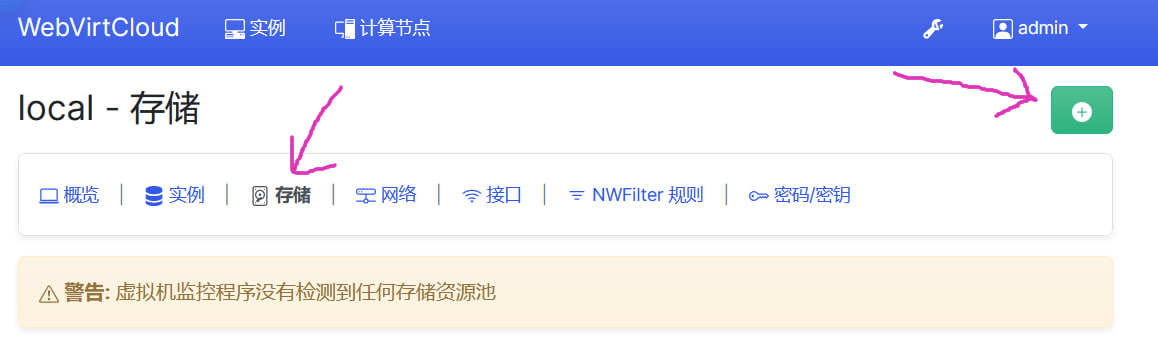
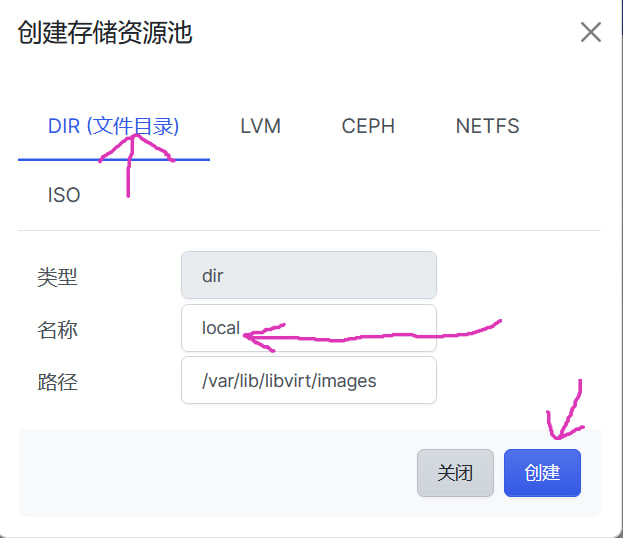
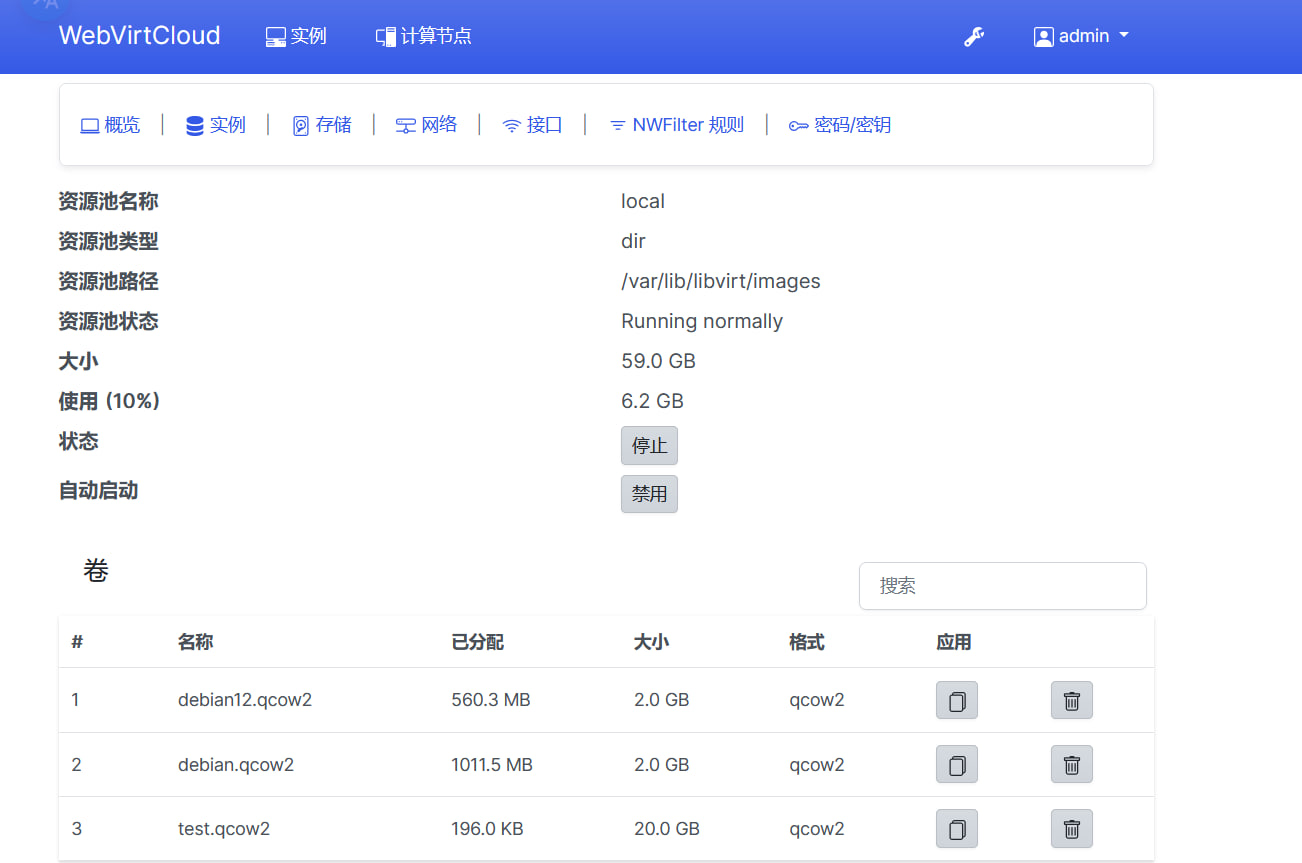
Under the Storage section, add a storage entry. Choose the type Dir and name it local. If you need to use an ISO for system boot, you’ll need to create a storage of type ISO. If not, just follow this guide and create only the Dir type.
After creation, download the appropriate qcow2 image for the system using the repository below:
https://github.com/oneclickvirt/pve_kvm_images/releases/tag/images
In the example, a Debian 12 qcow2 image is used:
cd /var/lib/libvirt/images
curl -sSLO https://github.com/oneclickvirt/pve_kvm_images/releases/download/images/debian12.qcow2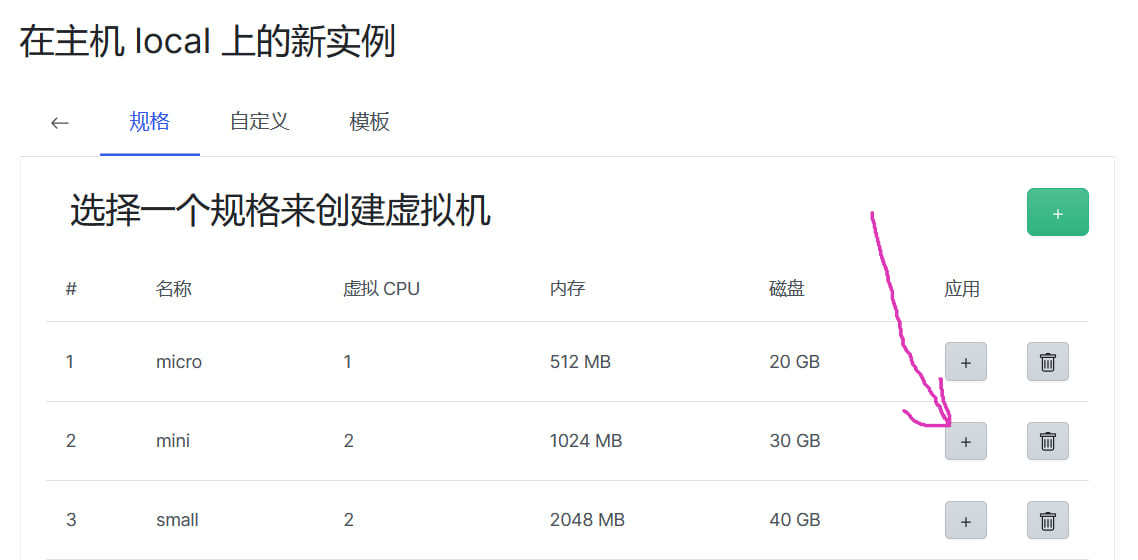
chmod 777 debian12.qcow2Return to the instance page to create a new instance.

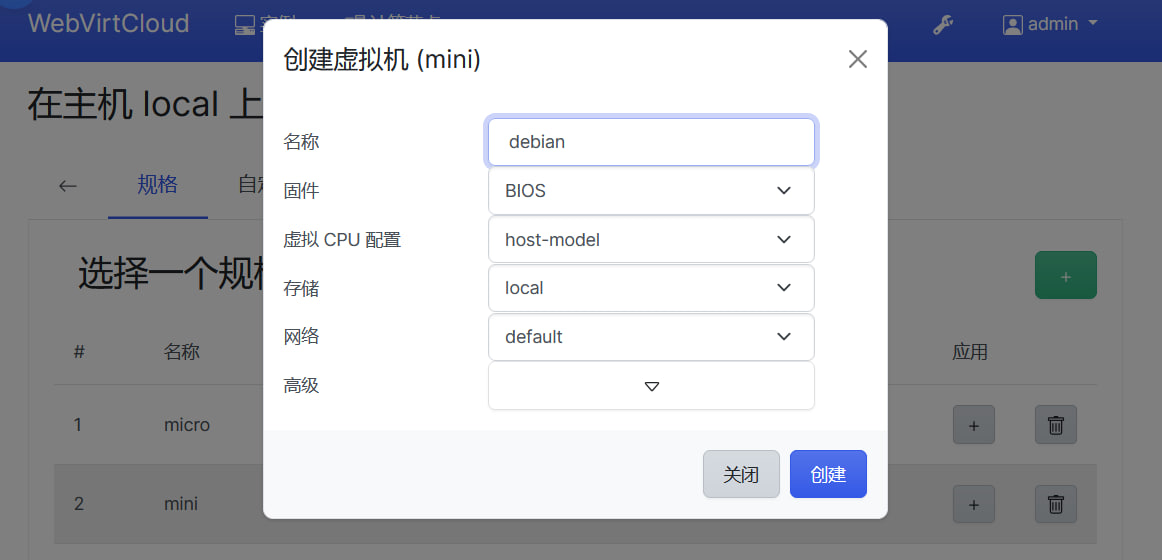
Select local as the compute node.

The default chipset is fine; changing it is optional.

You can use predefined sizes for the virtual machine or customize it, depending on your preference.
Note: the instance name must not duplicate the system name. For example, you cannot use debian12 as the instance name in this case.
After successful creation, do not power it on immediately.
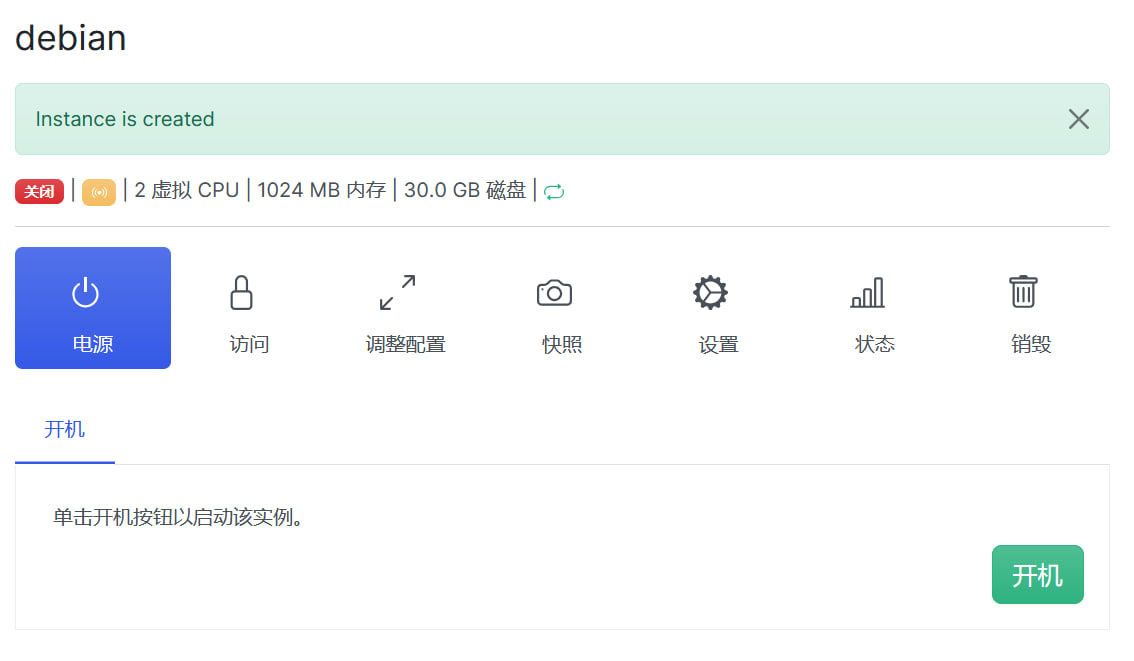
You need to modify the disk settings first.
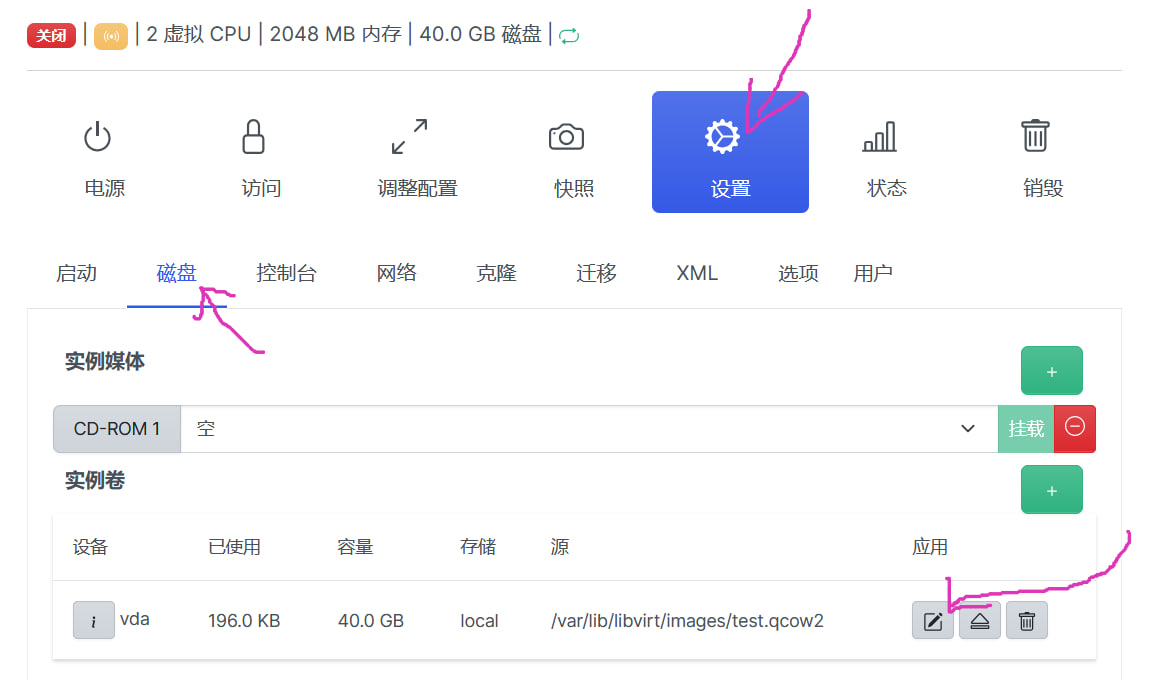
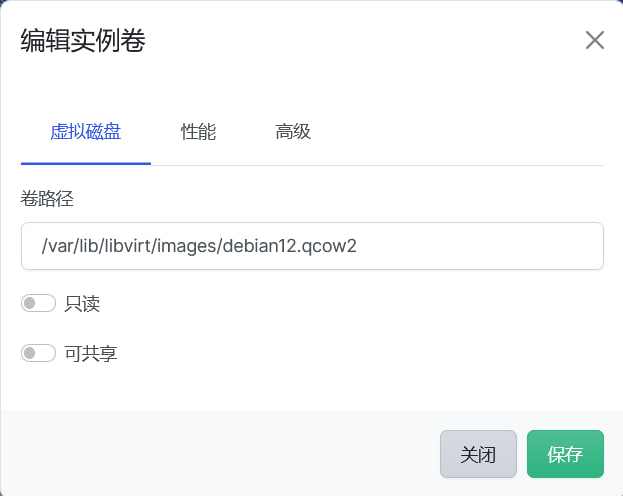
Change the disk file to debian12.qcow2, which matches the qcow2 image you previously downloaded.
After the modification is confirmed you will see a redundant disk in the local volume of the original compute node's storage, such as test.qcow2 here, which is best deleted to avoid hogging the disk
Once confirmed and configured correctly, return to the power page and turn on the VM.
The default login for the image is:
- Username:
root - Password:
passwordoroneclickvirt
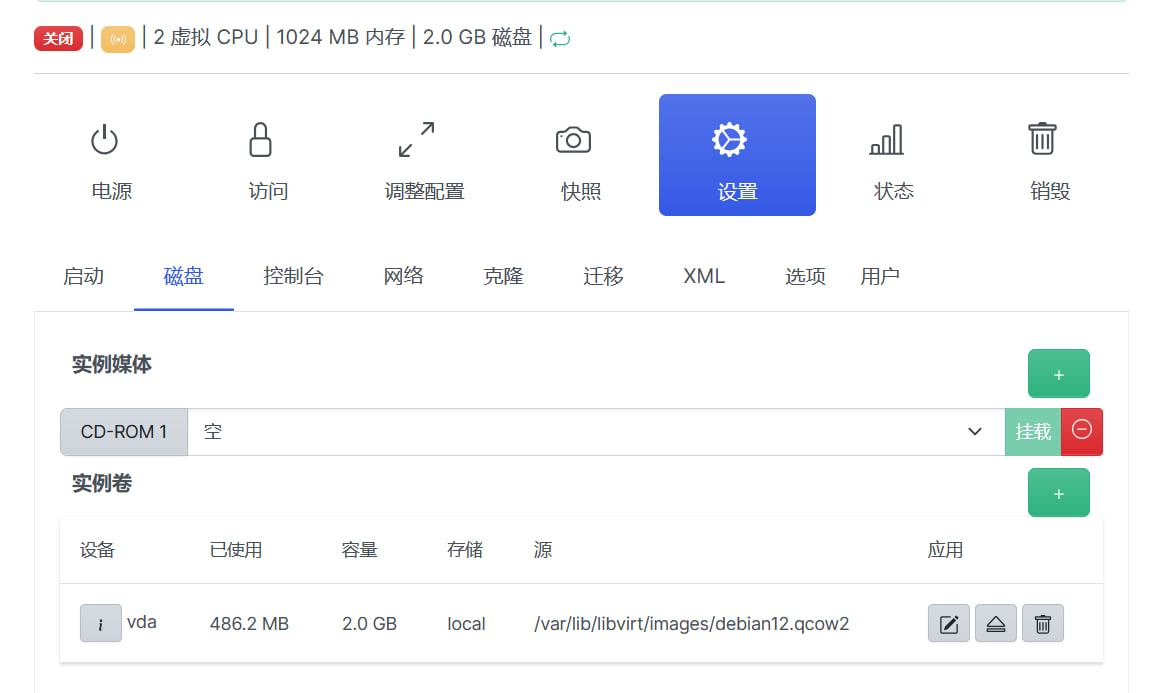
After booting, you will find that the hard disk is only the size of the original image, at this time you need to adjust the size of the hard disk, you need to shut down the computer again, at this time, you can see the buttons on the following page is available and the size of the hard disk is also recognized.
Without the first boot, the virtual disk size is not fully recognized and cannot be resized correctly. So this first boot step is required.
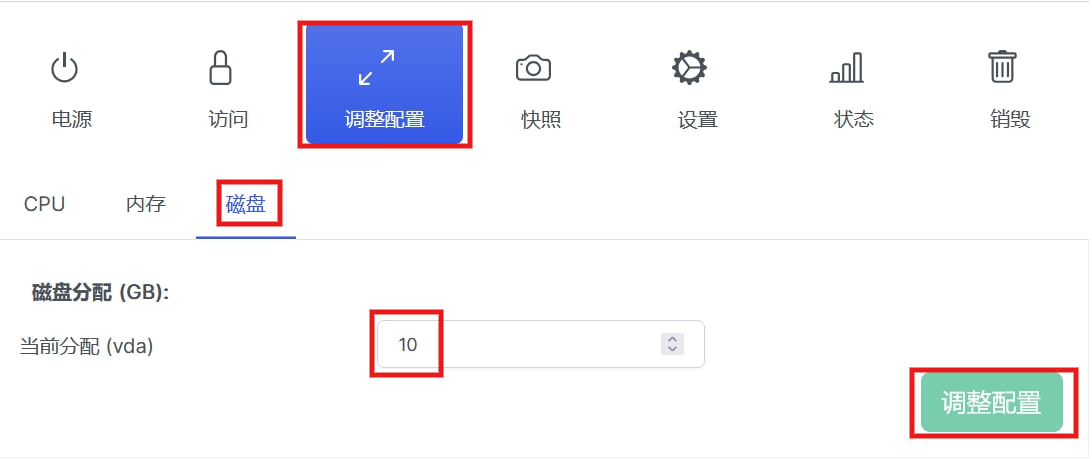
After the modification and restart the virtual machine, you will find that there is new disk space unallocated, at this time you need to follow the following method resize disk.
Check the disk path and remaining blank space unallocated:
lsblkThen use the following command to resize the disk
fdisk /dev/vdaDo this in the following order:
Type d to delete the old partition (yes, you need to delete the old vda1, no data will be lost as it will not be formatted later).
Type n and enter to create a new partition.
Select primary for type (default p) and just enter.
Partition number is also 1.
The start position must be the same as the old partition (default is right), just press enter.
Show if you want to erase fingerprints, type Y and enter.
Press enter at the end position to use all the remaining space.
Type w to save and exit.
At this point, use lsblk to confirm that the new free disk has been successfully allocated.
Disadvantages
Networking is not auto-configured — not as smart as the previous project — you still need to configure it manually.
You need to be in the VNC of the opened VM, logged in and execute
systemctl enable cloud-init
rebootManually enable the configuration to self-start after reboot, then reboot the server and you have internet.