Custom
Manage nodes without a dedicated public IPv4 address via Agent mode
For some local devices, the node may have IPv4 internet access but does not have a fixed/dynamic dedicated public IPv4 address. In this case, you cannot directly manage the node through SSH in standard mode. Here we provide a new management method: Agent mode.
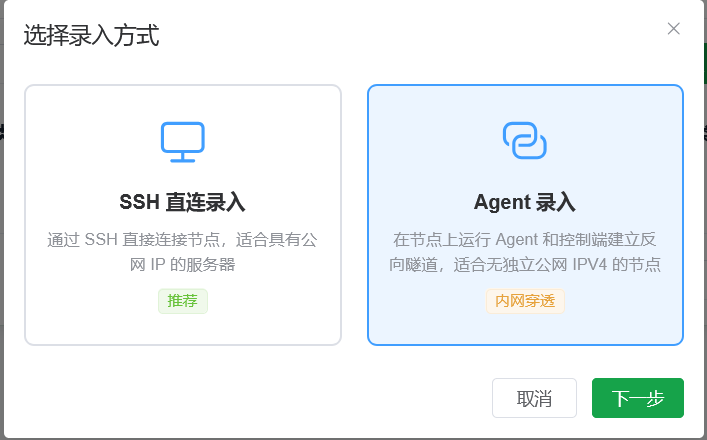
When adding a new node, click the corresponding mode, then enter the Basic Information page.
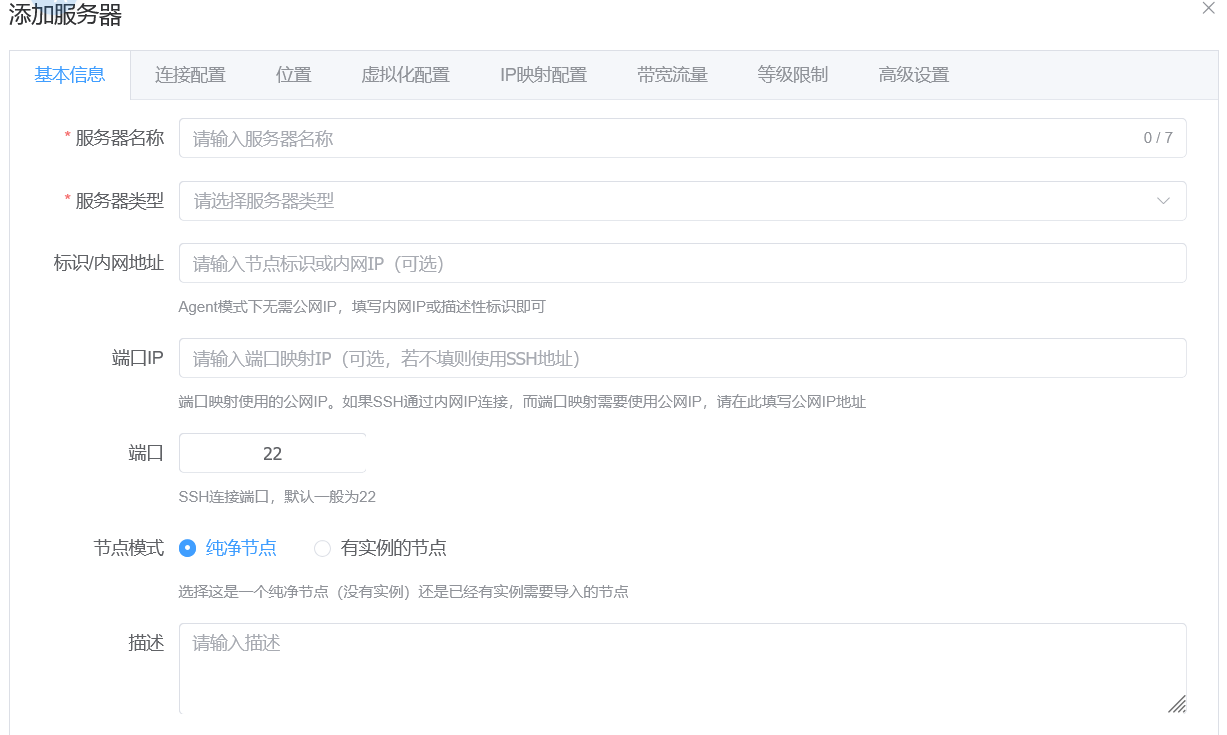
Unlike standard mode, in Agent mode:
IP AddressPort
These two fields are no longer required. The node can be managed normally even if they are left empty.
Local nodes / home broadband nodes / NAT network nodes should leave IP address and port empty.
Cloud servers / servers with a fixed IPv4 address can fill them in normally.
Note:
- If
IP AddressandPortare left empty, onlyNo Port Mappingis supported forNetwork Typelater. - If filled in, all
Network Typeoptions are the same as standard mode.

After clicking Save, you can see the command generation button in the Connection Configuration section.
Important:
- After saving, the system generates and locks the
Tokenfor this node. - The token cannot be refreshed or changed independently.
- If the token is leaked, you must:
- Delete the current node
- Re-add the node
- Re-fill all configuration
Keep the token safe and do not leak it.
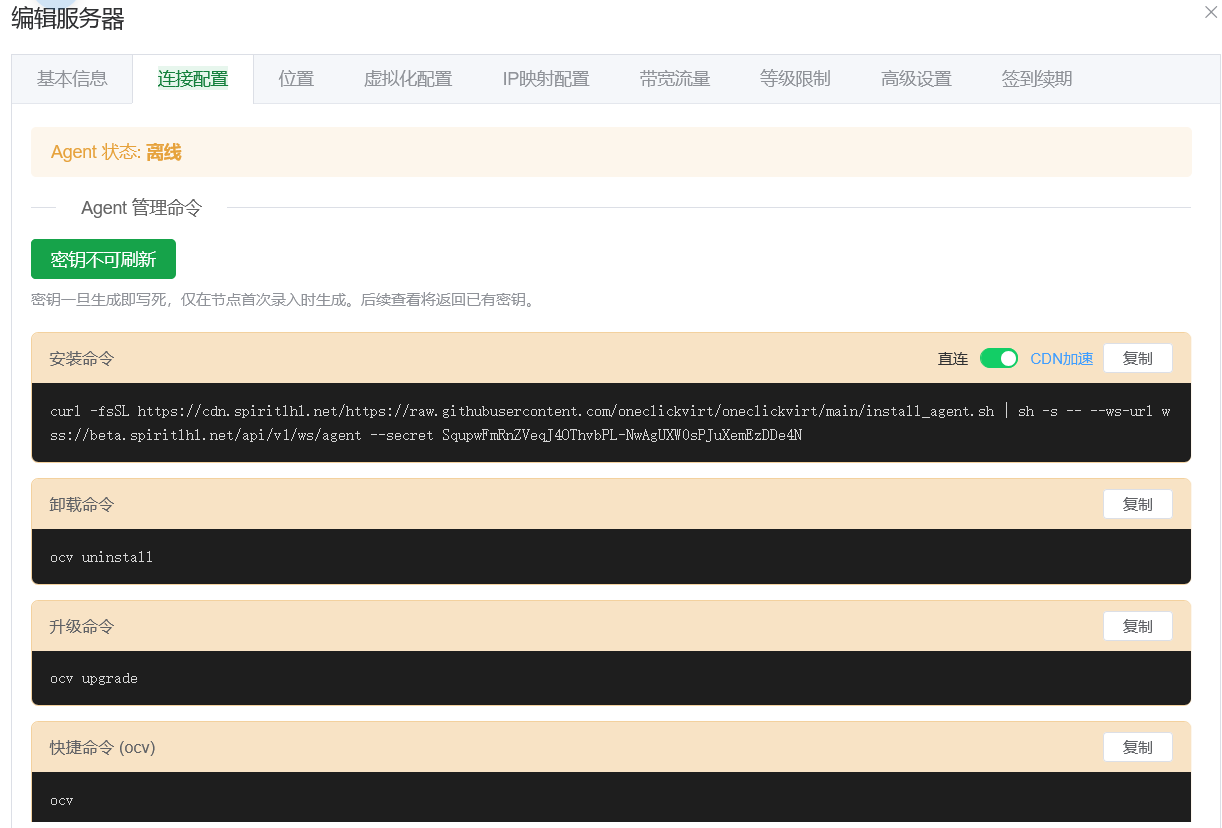
After clicking Generate (as shown below), copy the command and run it directly on the local node server to complete management access. After installation finishes, use the detection button at the bottom of this page for verification.
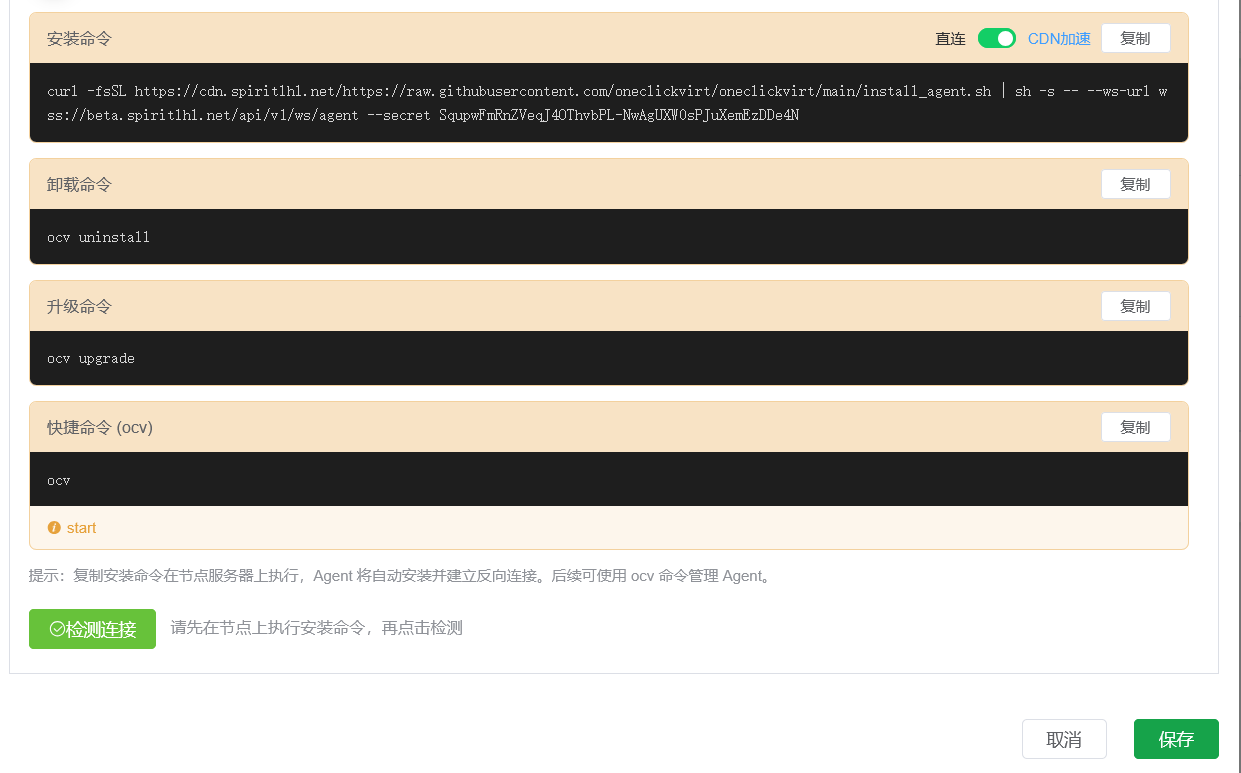
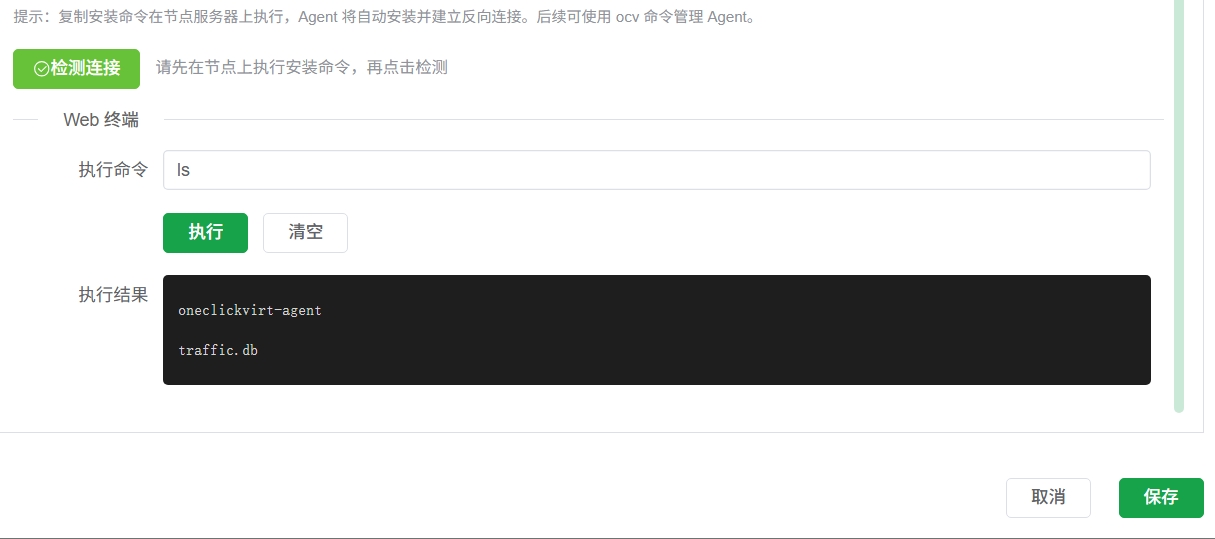
After detection succeeds, the following configuration pages can be operated according to the original standard-mode instructions; there is no major difference.
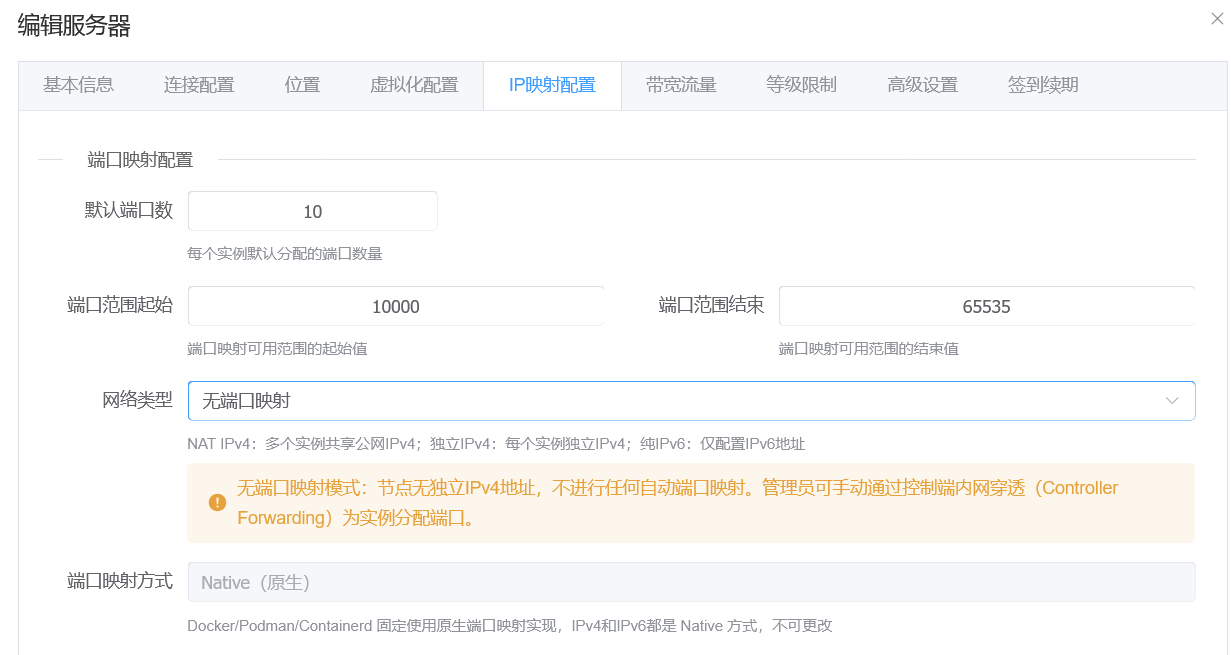
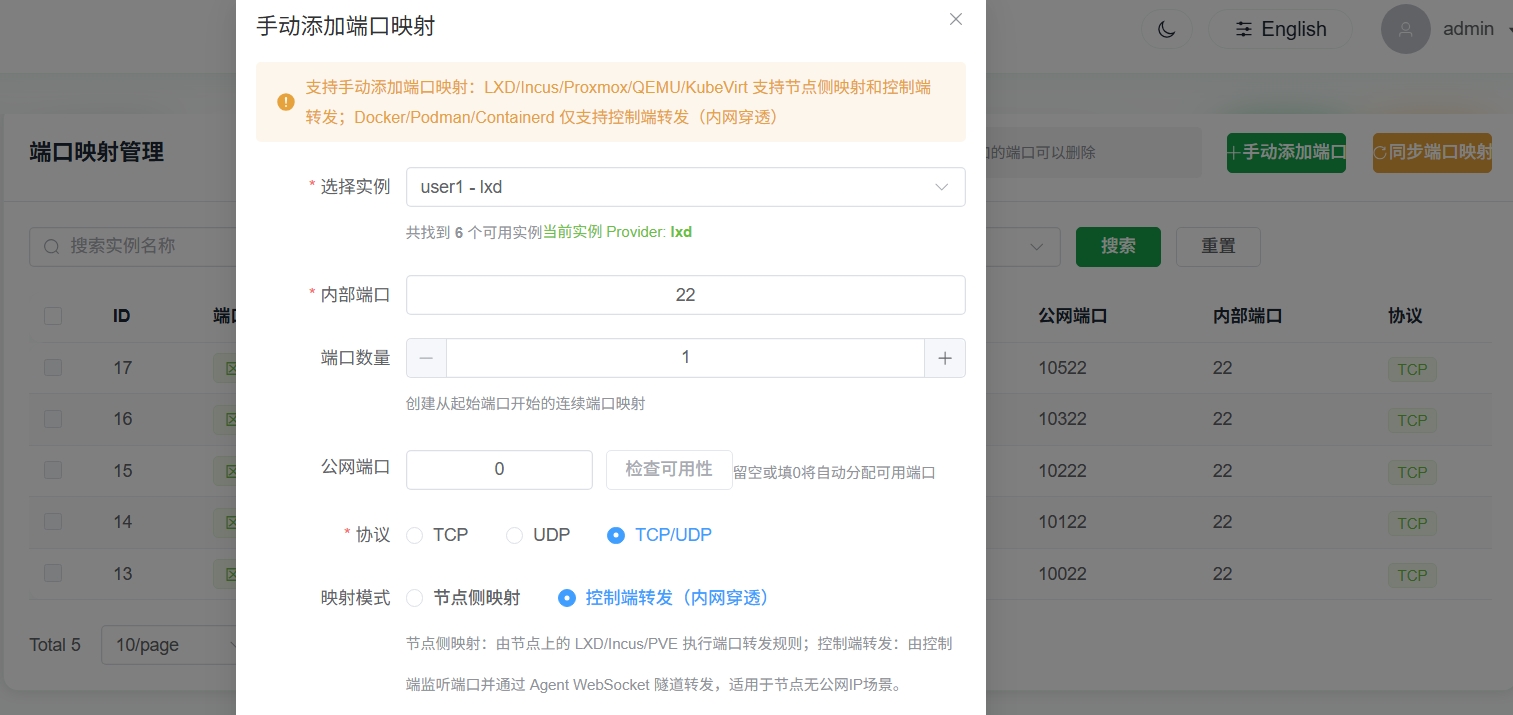
For local nodes, only this section differs: choose No Port Mapping. You can then manually use Add Port from the administrator Port Management page to tunnel node ports (intranet penetration) to the controller server's IPv4 address for external access.
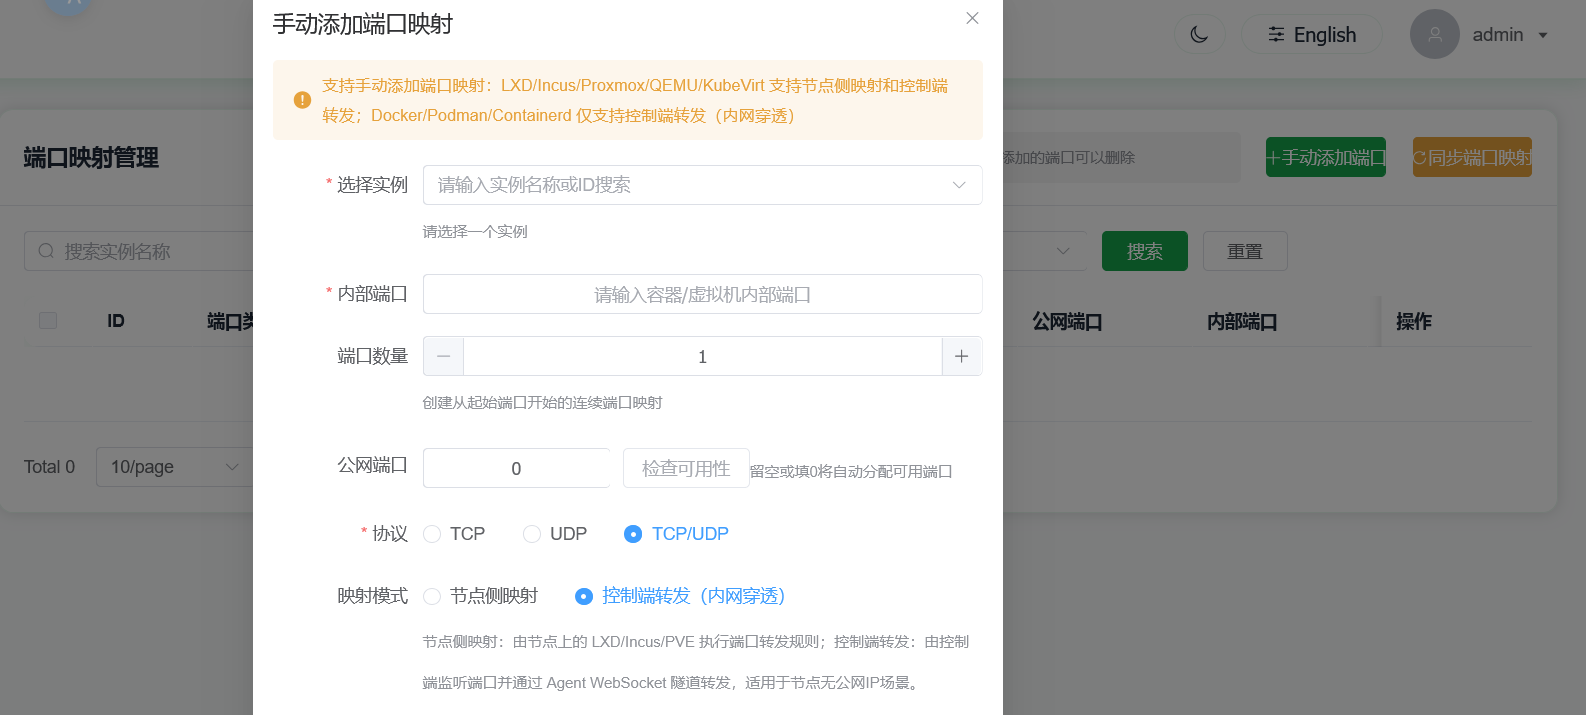
When manually adding port mapping, choose Controller Forwarding (Intranet Penetration). Non-required fields can be left empty; the system will automatically select available controller ports for mapping.
Controller Deployment Requirements
Because intranet penetration requires the controller to have control over the host machine's network and firewall, the controller must meet the following conditions:
Use one of:
Script DeploymentBare-metal compiled deployment
Deployed on:
- A Linux server with a dedicated public IPv4 address
Must have:
Root privileges
The following deployment methods are not supported:
DockerDocker Compose- Non-Linux systems
Otherwise, intranet penetration features will not work.
Intranet Penetration Feature Notes
The Intranet Penetration Port feature:
- Only supports nodes managed in Agent mode
- Tunnels traffic via
WS/WSSWebSocket forwarding
When configuring your reverse proxy, make sure protocol forwarding is correctly configured for:
WSWSS
Otherwise, intranet penetration will not function properly.
Security Recommendations
If the managed node requires:
- Anti-probing
- Anti-blocking
- Tunnel confidentiality
It is strongly recommended to:
- Bind a domain name to the controller
- Configure HTTPS
- Use
WSS protocolinstead ofWS protocolwhen adding the node
This effectively reduces the risk of the tunnel being detected, probed, or blocked.
Version Update Notes
After upgrading the controller, make sure to upgrade the node-side Agent as well.
During the update, source is controller — the script and Agent files are downloaded directly from a specific path on the controller.
Use LXD/INCUS to create containers with shared GPU devices
For nodes that need shared GPU devices, make sure the node has already installed the corresponding GPU driver before management, and that GPU commands run correctly, for example:
nvidia-smiMake sure the output is similar to:
root@a12-ThinkStation-P620:/root/sharefile# nvidia-smi
Sat May 16 20:23:07 2026
+---------------------------------------------------------------------------------------+
| NVIDIA-SMI 535.171.04             Driver Version: 535.171.04   CUDA Version: 12.2     |
|-----------------------------------------+----------------------+----------------------|
| GPU  Name                 Persistence-M | Bus-Id        Disp.A | Volatile Uncorr. ECC |
| Fan  Temp   Perf          Pwr:Usage/Cap |         Memory-Usage | GPU-Util  Compute M. |
|                                         |                      |               MIG M. |
|=========================================+======================+======================|
|   0  NVIDIA RTX A6000               Off | 00000000:61:00.0 Off |                  Off |
| 30%   42C    P0              83W / 300W |      0MiB / 49140MiB |      1%      Default |
|                                         |                      |                  N/A |
+-----------------------------------------+----------------------+----------------------+

+---------------------------------------------------------------------------------------+
| Processes:                                                                            |
|  GPU   GI   CI        PID   Type   Process name                            GPU Memory |
|        ID   ID                                                             Usage      |
|=======================================================================================|
|  No running processes found                                                           |
+---------------------------------------------------------------------------------------+Only after the host machine has the driver installed can GPU resources be shared into containers.
Then follow the Incus/LXD tutorial in this documentation to complete local environment installation. After installation, finish Agent-mode management through the controller and pass health checks before proceeding.
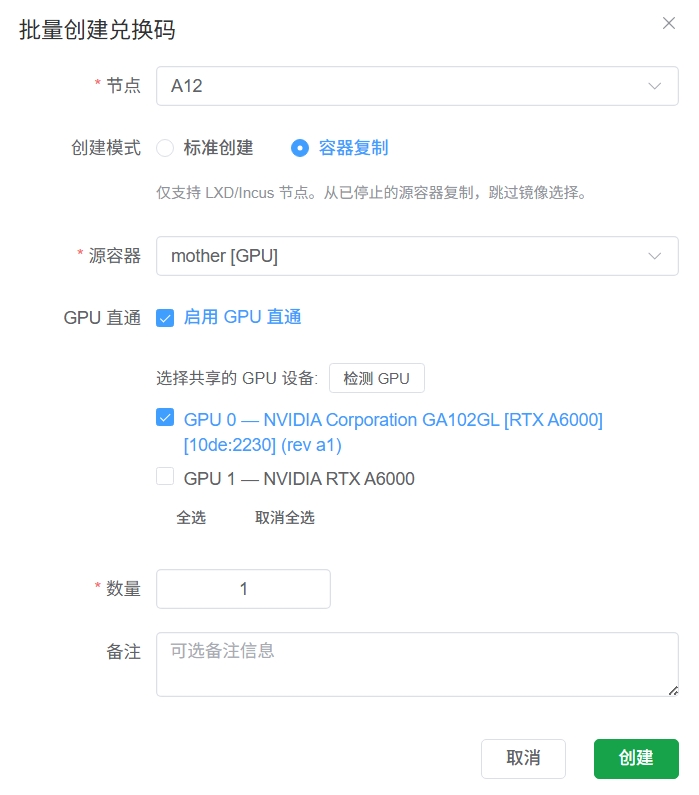
It is recommended to enable node "redemption-code-only claim" mode, then create containers with GPU devices from the administrator redemption-code page.
After creation succeeds, switch to the administrator's regular-user view to redeem it, then switch back to administrator view and go to the Port Management page to tunnel container ports so you can connect and configure directly via web SSH.
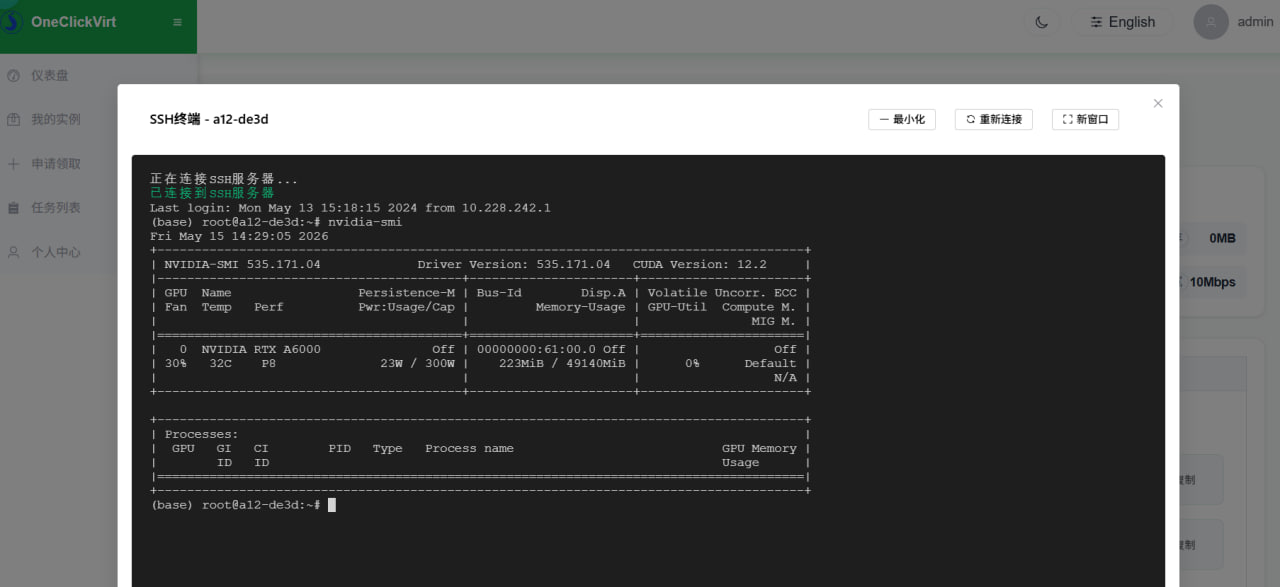
After adding successfully, you can directly use web SSH to connect and manage this new local container.
Inside the container, install the same driver version as the external host. During installation, make sure it does not load into the kernel by adding the --no-kernel-module parameter.
For detailed driver installation steps, refer to: https://www.spiritysdx.top/20240513/#容器内安装gpu驱动
After installation, running nvidia-smi inside the container should also return output, which proves GPU sharing is active.
At this point, you can stop this container and use it as a template. Use the redemption-code batch container creation "copy mode", set this container as the source container, and clone new containers from it.